WP Cloudflare Super Page Cache is a Cloudflare Caching Plugin for WordPress that solves the Caching issues associated with Cache Everything on the Free Cloudflare Plan.
Recommended
When you enable Cache everything in Cloudflare, your admin bar, login status and Post Edit buttons will be shown to non logged in users. This is very frustrating…
You can avoid this by disabling admin bar in WordPress setting and editing your theme to remove Edits in posts and comments. Doing this takes time and you may run into issues while editing and when the theme gets edited. Therefore, the Cloudflare Super Page Cache Plugin is Recommended.
The plugin is easy to setup. One of the ways to know that the plugin is working is that you will see swcfp after every URL when logged in. You can also check Cloudflare cache status to know if Cloudflare is Caching Correctly (Cache Hit). I have been using it and I can say that it is a good Plugin.
How to Set Up Cloudflare Super Page Cache Plugin
- Set up Cloudflare
- Login to Cloudflare
- Locate Get your API token
- Install Wp Cloudflare Super Page Cache Plugin Here (If you haven’t)
- Enter your Cloudflare Email and API under the plugin settings
- Choose the site you want to cache
- Configure the Plugin to your taste
- Done
Note: I disabled Log mode in the settings. The error logs can make your WordPress Installation size grow.
Recommended Settings For The Super Page Cache Plugin
CACHE LIFETIME SETTINGS
- Cloudflare Cache-Control max-age: 604800
- Browser Cache-Control max-age: 600
CACHE BEHAVIOUR SETTINGS
- Posts per page: Got to WordPress Reading Settings and Enter the number you see there. If you are using page builder, enter the number of posts that are shown on your homepage.
- Overwrite the cache-control header for WordPress’s pages using web server rules: YES
- Strip response cookies on pages that should be cached: If the page is not cached due to response cookies and you are sure that these cookies are not essential for the website to function, enable this option.
- Automatically purge the Cloudflare cache on website changes: YES
- Automatically purge the whole Cloudflare cache on website changes: NO
- Don’t cache the following page types: Don’t cache 404 and Search Pages.
- Prevent the following URIs to be cached: Leave blank unless you know what you’re doing
- Prevent XML sitemaps to be cached: Yes
- Prevent robots.txt to be cached: YES
- Bypass the cache for logged-in users: YES
- Bypass the cache for AJAX requests: YES
- PRELOADER: START PRELOADER
- BROWSER CACHE: ENABLE
- Purge Cache For Woocommerce Page: Use your Mind.
- Remove purge option from toolbar: Use your Mind
- Disable metaboxes on single pages and posts: No
Recommended: Don’t always request indexing
Automatically purge the cache For Other Caching Plugins
You can choose if you want the Plugin to Automatically Purge Caches of other WordPress Caching and Optimization Plugins. The Supported Plugins Are:
- W3 Total Cache
- LiteSpeed Cache
- Wp Fastest Cache
- HUMMINGBIRD
- Wp Rocket
- Wp Super Cache
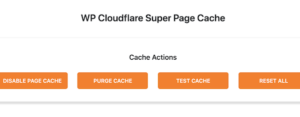
Super Page Cache Plugin Cache Actions
After Plugin Setup, you can take any of the following actions:
- Disable Cache
- Test Cache
- Purge Cache
- Reset All.
That’s all for Cloudflare Super Cache Settings. Hope you enjoyed this guide? Feel free to share with others and don’t fail to let me know how you feel using the comment box.
