Warren Buffett once said, “if you don’t find a way to make money while you sleep, you will work until you die”. Wondering how to achieve that? Blogging is one of the few ways to make money even while you sleep.
Recommended
You may want to click here to know more about blogging and how I started flashlearners.com or continue reading how to start a WordPress blog by yourself for the year 2022.
Before I embark on my procedures, I will like to emphasise the fact that the first three episodes are prerequisites for this promising topic. If you have not been following us, then quickly use any of the following links to access the previous episodes you missed.
- The Vision And General Framework (Episode 1)
- Introduction To Blogging, SEO And How I Started (Episode 2)
- Niche, Domain, SEO, Hosting And WordPress (Episode 3)
Now, do you want to start a blog but don’t know how to go about it? You are not alone. Don’t worry, I am here to teach you everything you need to start your own blog even today.
Note: You don’t need to be a programmer, tech person or computer guru to start a WordPress blog. I recommend blogging to even students. Also, you can start blogging with your phone until you are able to afford a Laptop.
Having helped over 100 humans create a blog, I have decided to create this simple guide on how to start your blog without any technical knowledge.
What You Need To Start a Blog
The steps in this article are very easy to follow whether you are 18 years old or 50 years old. However, if you need help, I will help you set up your blog. Chat me Up On WhatsApp @07084346619 or Click Here to Get Help Setting Up Your WordPress Blog
There are three things you need to create a WordPress blog:
- A domain name idea (this will be the name of your blog i.e flashlearners.com)
- A web hosting account (this is where your website live on the internet)
- Your attention for 40 minutes.
Yes, you read it right. You can start a blog from scratch in less than 40 minutes, and I, Flashisaac will walk you through the whole process, step by step.
Ready? Take a glass of chilled water and let us begin the journey.
Step 1. Setup
The biggest mistake beginners make when building a blog is choosing the wrong blogging platform. Thankfully you’re here, so you won’t be making that mistake.
For 95% of users, it makes more sense to use WordPress.org also known as self-hosted WordPress. Why? Because it is free to use, you can install plugins, customize your site design, and most importantly make money from your site without any restrictions.
Now you have probably heard that WordPress is free. You might be wondering why is it free? What’s the catch? There’s no catch. It’s free because you have to do the setup and host it yourself.
In other words, you need a domain name and web hosting. A domain name is what people type to get to your website. It’s your website’s address on the internet. Think google.com or flashlearners.com
Web hosting is where your website live. It’s your website’s house on the internet. Every website needs web hosting.
A domain name typically costs $14.99 / year, and web hosting normally costs $7.99 / month. That’s a lot for beginners who are just starting out.
For hosting, I highly recommend Hostgator. I am a full time Hostgator customer. You may want to click here for top reasons to use Hostgator.
NOTE: I believe in transparency. If you sign up with Hostgator using my referral link, I will earn a small commission at no extra cost to you (in fact, you will save money). However, I only recommend products that I personally use and believe will add value to my readers.
Let’s go ahead and purchase your domain + hosting.
Go to the Hostgator homepage, and click on Webhosting in the navbar or click on get started now (follow screenshots below).
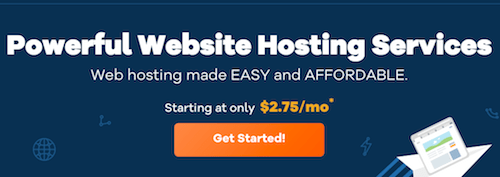 Select Hostgator Hosting Plan
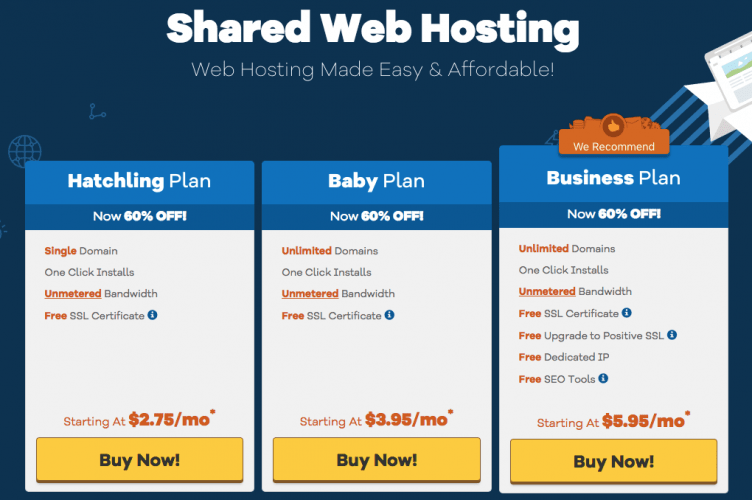
On the next page under the “Baby Plan” dropdown, select one year or more. I suggest booking your hosting for at least two years for best price.
Here is a quick chart to help you pick the right hosting plan:
- Hatchling plan: When you want to host only one website
- Baby plan: When you plan to host more than one site (I recommend this)
- Business plan: When you need dedicated I.P
Select your domain name:
If you already own domain, select the part which says “I currently have a domain name.” Otherwise, you can buy a domain from Hostgator. Remember, Hostgator charges $12.95/domain.
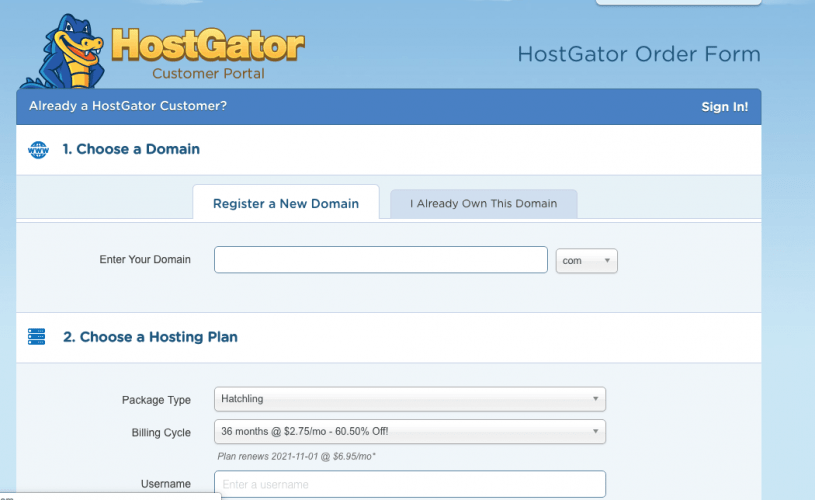
Billing Info:
In the “billing info” field, you need to give your address and phone number. I suggest that you double check this information making sure it is correct, as they are going to call you on your provided mobile number to verify the intended purchase.
This is to ensure the security of your account. Here you can also select your payment method: PayPal or Credit card. You can then pay with your ATM card. If you select PayPal, on the next page, you will be redirected to the PayPal payment page.
In the additional service section, ensure you uncheck everything. Https is now free, so leave it checked. Most of the paid add-ons are not worth it as we have free alternatives.
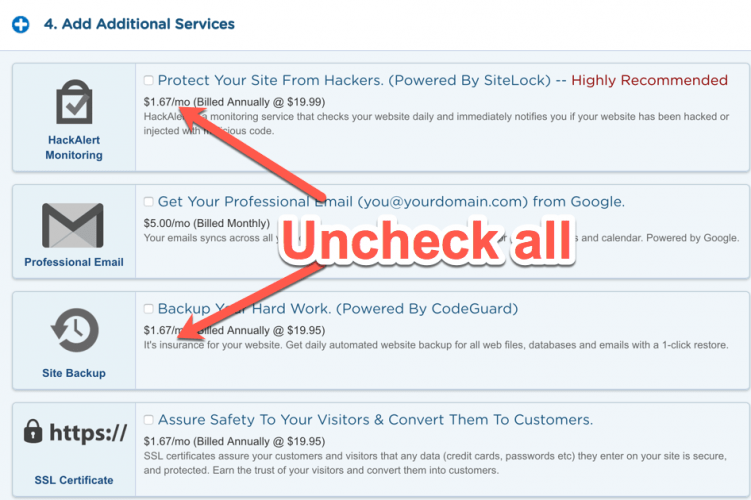
Once you are satisfied, click on “Create Account.” Depending on your payment method, you will be taken to the PayPal payment page, or the “successful order placed” page.
In about a minute you will receive an email from HostGator confirming your order, and within an hour you will be receiving a call with your new hosting account details.
Step 2. Install WordPress
One of the fastest and easiest ways to Install WordPress on your hosting account is using QuickInstall powered by Mojo marketplace. It will make the installation process easy, and within minutes you will have your WordPress blog installed, up and running.
HostGator offers various ways by which you can install WordPress on their server.
- Manual
- Quick Install
Login to your HostGator web panel. Under services/Software click on QuickInstall.

On the QuickInstall page, you need to select “WordPress’ on the left side. HostGator also offered services that will cost you a lot to Install & simply setup a Theme. I would suggest skipping that option, & just follow this guide to setup everything of your own. (It’s easy & doesn’t take much time)
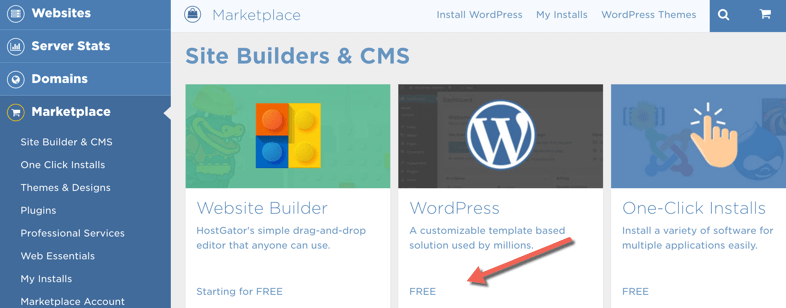
On the next page, drop-down select the domain on which you want to install WordPress on.
Here you can decide where you want to install WordPress. Either at the root of the directory or under the sub-domain. For example:
- Root Directory: https://flashlearners.com
- Sub-directory: https://flashlearners.com/blog
If you are new to HostGator and have a baby plan or above plan, you can add as many domains as you want and you can host multiple websites on a single hosting package.
Click on next & now configure the rest of the settings.
Make sure that you don’t use “admin” as username, as this is a security risk. Rather use your email address or your nickname.
The point is to make it hard to guess. Before hitting the magic button Install WordPress, Crosscheck if you have done everything right. Else rolling back things will consume time.
While HostGator Quick Install is setting up your WordPress blog, it might try to upSell you by offering stuff like WordPress theme or any such service.
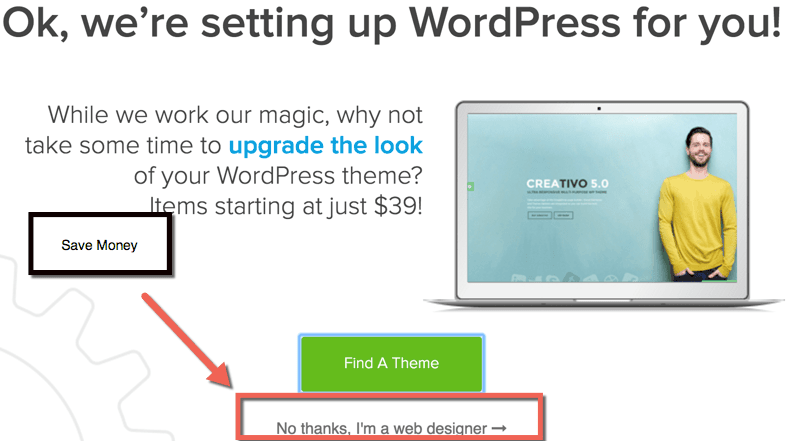
I suggest you Skip it & I did the same. It’s easy to Install WordPress of your own. It will take few minutes, and your WordPress blog will be installed & you will get an email with your dashboard link, username & password.
Step 3. Selecting your WordPress Theme
The visual appearance of your WordPress blog is controlled by themes. When you first visit your blog, it will look something like this:
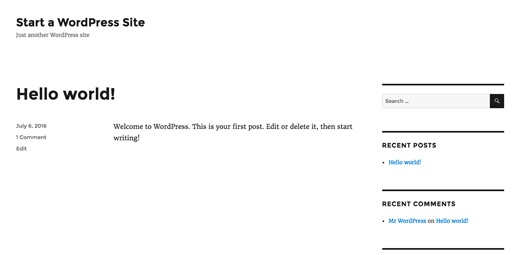
This is not very appealing to most people.
Customizing the look and feel of your blog is by far one of the most exciting and rewarding part in the journey of creating your WordPress site.
There are thousands of pre-made WordPress themes that you can install on your site. Some of them are free, while others are paid.
You can change your theme by going to your WordPress dashboard and clicking on Appearance » Themes.
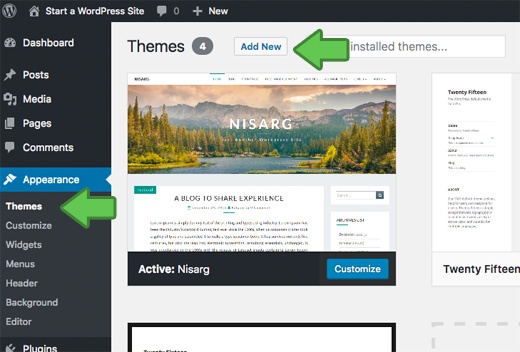
Go ahead and click on the Add New button.
On the next screen, you will able to search from 5600+ free WordPress themes that are available in the official WordPress.org themes directory. You can sort by popular, latest, featured, as well as other feature filters (i.e industry, layout, etc).
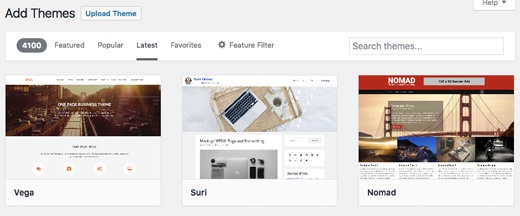
You can take your mouse over to a theme and you will see a Preview button. Clicking on will open the theme preview where you can see how it would look on your website.
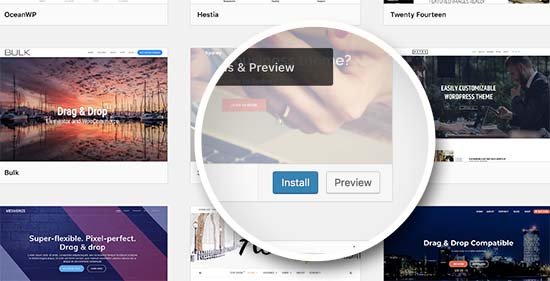
The preview of your theme may not look exactly as shown in the screenshot, which is normal as you will get to customize and set it up later. What you need to look for is design, colors, typography, and other elements.
The best tip to select the perfect WordPress theme is to strive for simplicity in design. It helps you keep things clean and clear while offering a good experience to your users.
When you have found the theme that you like, simply bring your mouse on it, and it will show the Install button. Click on it and wait for the theme to be installed. After that, the install button will be replaced with an Activate button. You need to click on it to Activate the theme.
Once you have installed your theme, you can customize it by clicking on the Customize link under the Appearance menu.
Once you have selected your WordPress theme, you are now ready to create your first blog post.
Step 4. Creating Your First Blog Post
To write your first blog post, click on the Posts » Add New menu in your WordPress dashboard.
You will see an editor area where you can write your first blog post.
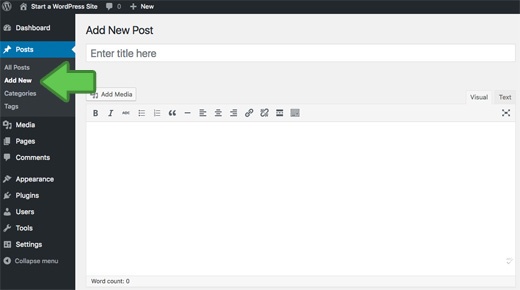
Once you’re done writing, go ahead and click on the Publish button on the right to publish your first blog post to the world.
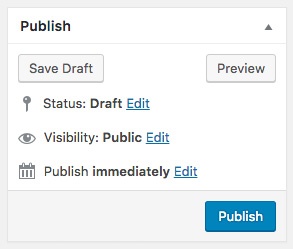
On the posts screen, you will notice several other sections such as Categories and Tags. You can use these to organize your blog posts.
Step 5. Plugins And Customisations
Once you have written your first blog post, you probably want to get started with adding other usual elements on your website such as contact forms, galleries, sliders, etc.
To add all these additional features, you need to use plugins. WordPress plugins are apps that allow you to add new features to your website.
There are over 55,000 WordPress plugins available in the free WordPress plugin directory alone. This means no matter what you want to accomplish, there is a plugin for it. I have a step by step guide on how to install a WordPress plugin.
That being said, let’s take a look at how to use plugins to add some essential features to your WordPress blog.
Recommended: Best plugins to use on your blog
How to Create a Contact Form in WordPress
Every website needs a contact form. It allows your users to contact you directly. Since WordPress doesn’t come with a built-in contact form, you will need a WordPress form builder plugin to add a contact form on your site.
I recommend using the WPForms Lite or Contact Form 7 plugin. WPForms Lite is a free version of the popular WPForms plugin.
You can install the plugin by going to Plugins » Add New page and typing WPForms in the search box. Next, you need to click “Install” and then “Activate”. Upon activation, you need to head over to WPForms » Add New page to create your first form.
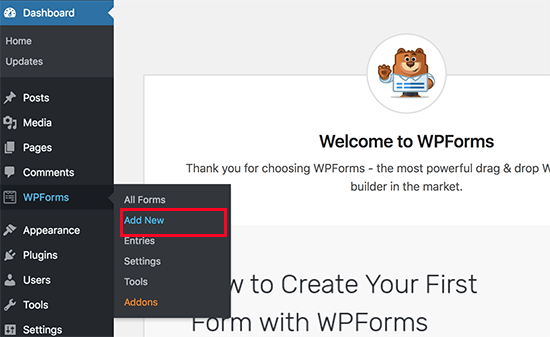
This will open the WPForms builder interface.
First, you need to enter a name for your contact form and then click on ”˜Simple Contact Form’ template.
WPForms will now create a simple contact form for you with all the required fields. You can click on any field to change it, or add a new field from the left column.
Once you are done editing the form, click on the save button at the top right corner and then exit the form builder.
You can now create a new page in WordPress by going to Pages » Add New and call it ”˜Contact’. On the edit screen, you will notice a new ”˜Add Form’ button.
When you click on it, it will bring up a popup where you need to select the form you created earlier and then click on the add form button.
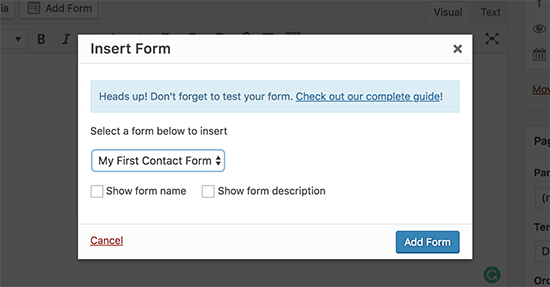
WPForms will now add the form shortcode into your page. You can now save and publish the page and visit it in your browser to see your contact form in action.
How to Setup Google Analytics Tracking
Google Analytics helps you see how many people are visiting your blog, where they are coming from, and what are they doing on your website?
It is best to install Google Analytics when starting your blog, so you can see how much your blog has grown over time. You may want to click here for how I recommend that you setup google analytics or see a general way below.
First, you need to visit Google Analytics website and sign in using your Gmail account. Once you are logged in, you can go ahead and sign up for a free Google Analytics account.
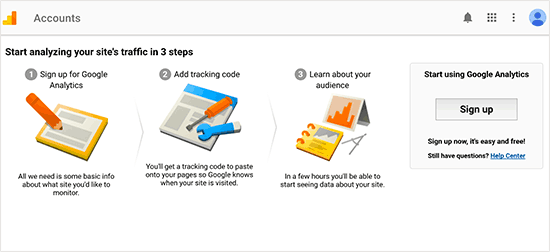
You will be asked to provide your information and website URL. After that, you will be presented with your Google Analytics tracking code.
You can stop here because we will be using a plugin to automatically fetch and add this code to your blog.
Switch to your WordPress admin area to install and activate the MonsterInsights plugin. It is the free version of the best Google Analytics plugin for WordPress, and it is the easiest way to add Google Analytics on your site.
Upon activation, you need to visit Insights » Settings page to configure the plugin settings.
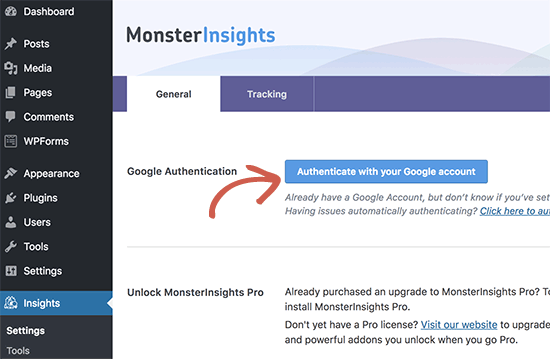
On the settings page, click on the ”˜Authenticate with your Google account’ button to connect Google Analytics to your WordPress site.
Follow the onscreen instructions to complete the setup. Once done, you will be able to see your website analytics report straight from your WordPress dashboard under the MonsterInsights tab.
For detailed instructions, see our article on how to install Google Analytics in WordPress.
How to Optimize Your WordPress Blog for SEO
Most beginners don’t optimize for SEO when creating a blog. SEO or search engine optimization helps users find your blog in search engines. If you want more traffic, then it’s crucial that you optimize your blog for SEO from the beginning.
To get started, first you need to install and activate the Yoast SEO plugin. It is the complete WordPress SEO plugin that will help you optimize your blog.
Upon activation, you will see a new menu item labelled ”˜SEO’. Clicking on it will take you to the plugins settings page.
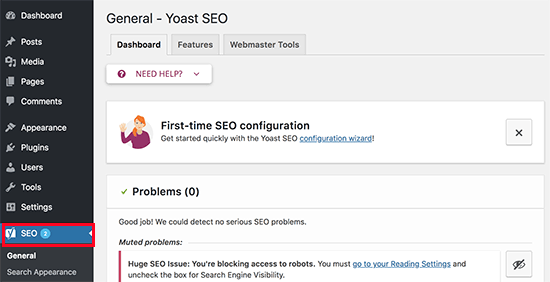
The plugin comes with a quick configuration wizard to help you walk through the setup. You can also follow the instructions in our Yoast SEO guide for manual set up.
Recommended: Onpage SEO and creating high-quality content
More WordPress Plugins and Customisations
There are a ton of other WordPress plugins that you can install. Often beginners find it a bit overwhelming to search for the plugins they need.
Here is a pick of the best WordPress plugins that you should check out.
- Backup – UpdraftPlus is the best WordPress backup plugin. You need to create regular backups of your website in case something ever goes wrong.
- Security – Sucuri Security is a free security scanner for WordPress.
- Performance – I recommend using WP Super Cache or w3 total cache to speed up WordPress. Please don’t use both at the same time.
Step 6. Making Money From Your Blog
Check here to read my article on the ways you can make money blogging.
Recommended Articles:
- 20 Topics that will give you more traffic
- How to create high-quality content
- How to rank on Google front page
- How to let people know about your blog
12 Points To Note While Using WordPress
- Don’t install too many plugins.
- Don’t install two plugins that perform similar functions.
- You need to create about page that speaks of what your blog is about.
- Create a contact page so that people can reach you.
- When writing articles, use new posts and not pages.
- Note differences between posts and pages.
- Go through your WordPress admin and play with some things.
- Under appearance, click on widgets to add sidebars.
- Always contact support when you are facing any issue, e.g iPage live chat.
- Display Excerpt (Post Summary) on Home and Archive Pages
- Goto Appearance-customize to set up your theme.
- Goto Appearance-Themes-Add new to add New theme from WordPress directory… You can also upload downloaded theme from your computer
- Go through different settings but don’t get yourself into trouble.
Hope you found this guide helpful? Feel free to share with others and don’t fail to let me know how you feel via the comment box.
References
- Hostgator.com
- WPBeginner.com
- Shoutmeloud.com
- Google.com Search
- Flashlearners.com
Latest On Flashlearners Blogging Series
EsbeDak says
Cool + for the post
Magnus Onyemuchara says
i need to create my own blog.How much will it cost me..
Lovette samantha says
I have always wanted to be a fashion blogger.. Its amazing am opportuned to read this today. Kisses to u and thank u.
Gabriel Akin says
You are wonderful bro. I can bodly say that you have really inspired me to create my own blog through your helpful guides. God bless.
Isaac Inegbenehi says
I am glad that I could help. I wish you success in your blogging career. Don’t fail to contact me if you have more questions
happiness andesati says
Atize
Success says
pls I want to start this new. what do I need to do
MacDonald Ezeani says
Flash am really shut of words, infact this post is blogging bible for beginners
musa ahmad says
yan uwa YAKIKE don Allah inaso inshiga cikin wannan makarantay ta NDA atemakaman
EMMANUEL BASSEY EMMANUEL says
PLS IS HOUR CENTER EXAM FOR NDA THOSE IN CALABER TELL ME
Rachel Charles says
Thanks for the article, it was really inspiring and helpful as well, God bless you sir..please if you don’t mind sir send ur whatup contact.it will be a great previllege for me.
Rachel Charles says
Thanks for the article, it was really inspiring and helpful as well, God bless you..please if you don’t mind send ur whatup contact.it will be a great previllege for me.
Merit says
Sir I haven’t received any email from jamb office please what will I do about it
nick says
please sir, can I do all this with an android phone?
Anonymous says
Yes
Obutor says
Please Sir when I try opening my website, instead of opening the home page it opens ‘HostGator Web Hosting website startup Guide’. What can I do to change that? (Hatch)
David says
Please how can I change a blog name??
Isaac Inegbenehi says
Buy a new domain name, host it and then transfer the content of your old domain name to it. After that, redirect the old domain name to the new one you just bought.
David says
Ok… Thanks A Lot
Though am having difficulties customizing
Isaac Inegbenehi says
An article on that loading
Evadon joe says
please I need connection
KELECHI KESTER says
HW will I download the exam past question and answer.
Anonymous says
Ask am oooo
ONYUMA JOHN says
Sir pls how can i create a support email address such as this for my blog
e.g info@johnblog
Thompson says
Thanks so much for sharing this
Isaac Inegbenehi says
You are welcome Thomson
Idris Ya'u says
This is a self explanatory, worthy for international recognition.
Thank You
Isaac Inegbenehi says
Thanks Idris
Kelvin says
Please send me your email or your Whatsapp Contact so that I can get intouch with you directly I really need your assistance, thanks
Isaac Inegbenehi says
[email protected]
Anonymous says
You’ve really done a good job, the article is self explanatory, no need for the help of an expert.
Isaac Inegbenehi says
I am glad you found it helpful
Saheed Soneye says
Thank you for this wonderful guide. It is easy to follow and will be really helpful.
Question is, how do I install SSL certificate for my blog(particularly Namecheap). I hope you’ll write an article in that soon.
Thanks Isaac.
Isaac Inegbenehi says
An article on that loading…